Components
See the collection of components in the Components library
Creating presentations is a repetitive process. It is quite common to have some elements shared between different slides.
Basics of WLX
To overcome this small issue, one can use the WLX language to define a heading, for instance:
.wlx
Heading[OptionsPattern[]] := With[{Title = OptionValue["Title"]},
  <dummy>
    <h1><Title/></h1>
    Some repetitive text you need
  </dummy>
]

Options[Heading] = {"Title" -> "Nope"}
WLX always requires a single parent element if you define a function using XML tags. Use <dummy> or <div> to wrap them.
You can then use it on your slides as if it were a normal tag:
.slide

<Heading title={"Some title"}/>

<br/><br/>

The actual content

Maybe some equations $m \\mathbf{a} = \\mathbf{F}$
Unfortunately, it is tricky to use standard Markdown inside components, because it requires carriage returns between XML/HTML and Markdown tags, which are trimmed by default. However, for equations, it still works:
.wlx

Heading[OptionsPattern[]] := With[{Title = OptionValue["Title"]},
  <dummy>
    <h1><Title/></h1>
    Some repetitive text you need
    Here is a random equation $x^2 + y^2 + z^2 = r^2$
  </dummy>
]

Options[Heading] = {"Title" -> "Nope"}
Title and Footer
Let's us give you more complicated example:
.wlx
MakeTitle[Title__String] := MakeTitle[StringJoin[Title]]
MakeTitle[Title_String] := With[{
logo = "https://www.trr360.de/wp-content/uploads/2022/04/cropped-logo_small-1.png"
},
<div class="relative flex w-full text-left flex-row gap-x-4" style="align-items: center; margin-bottom:1.5rem;">
<div style="bottom:0; z-index:1; position: absolute; background: linear-gradient(to left, red, blue, green); width: 100%; height: 0.7rem;"></div>
<img style="margin:0; z-index:2; padding:0rem;" width="120" src="{logo}"/>
<h2><Title/></h2>
</div>
]
Footer = With[{},
<div class="w-full ml-auto mr-auto absolute text-sm" style="top: 690px">
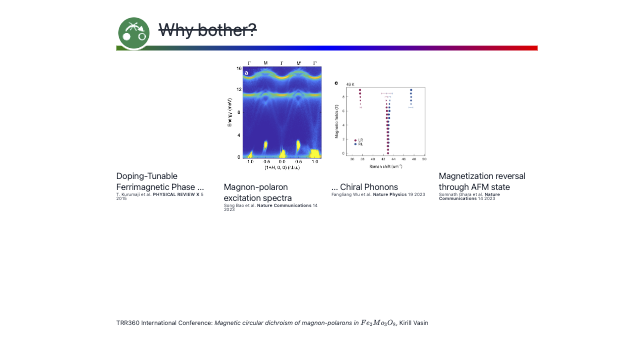
TRR360 International Conference: <i>Magnetic circular dichroism of magnon-polarons in $Fe_2 Mo_3 O_8$
</i>, Kirill Vasin
</div>
];
Then we can reuse this on any slide
.slide

<!-- .slide: class="slide-standard" -->

<MakeTitle>$Fe_x Zn_{2-x} Mo_3 O_8$ is a <b>platform</b> for</MakeTitle>

Content goes...

Content goes...

Content goes...

<Footer/>
Import components
Use Import notebook feature to put all your helper tools to a separate notebook and import them to your presenting notebook if needed.
Your globally defined symbols will be isolated in a generated context.
Decorators
Decorators with WLXForm, such as Row and Column, can be used on slides natively.
.slide
<!-- .slide: class="slide-standard" -->
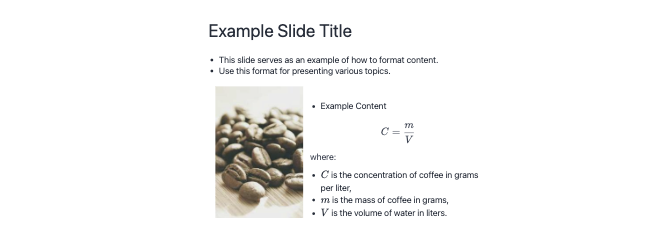
## Example Slide Title
<ul>
<li>This slide serves as an example of how to format content.</li>
<li>Use this format for presenting various topics.</li>
</ul>
<br/>
<Row>

<div style="width:400px; margin-top:2rem">
- Example Content
$$
C = \frac{m}{V}
$$
where:
- $C$ is the concentration of coffee in grams per liter,
- $m$ is the mass of coffee in grams,
- $V$ is the volume of water in liters.
</div>
</Row>
ManipulatePlot is also a combination of those, which makes it possible to output it directly without using EditorView.
Figure = Plot[x, {x, 0, 1}];
Editor = EditorView["Plot[x, {x, 0, 1}] -> "];
.slide

<Row>
	<Editor/>
	<Figure/>
</Row>

In the same way you can place InputButton, Graphics and any interactive elements on the slide!
Custom Layout Helpers
This is a common case where components come in handy. Imagine a typical situation where we need to organize columns in a presentation:
.wlx

Columns[cols__] := With[{width = 99 / (List[cols] // Length) // Floor},

  With[{Layout = Table[
    <div style="width: {width}%">
      <Col/>
    </div>
   , {Col, List[cols]}]
  },

    <div style="display:flex">
      <Layout/>
    </div>
  ]

]
Here we first calculate the width of each column based on their number, and then use standard HTML with CSS to style them.
Since the input argument is not typed, you can use nested tags or WL expressions as content for each column. Here's one of the slides from @JerryI's presentation at a recent 2023 talk:
.slide

# Different ways of calculating properties for magnetic materials

<br/><br/>

<Columns>
  <p style="text-align:left">

## DFT+U
DFT with Coulomb repulsion between sites allows modeling of localized magnetic moments

- lacks ~1 cm$^{-1}$ accuracy
- slow and time-consuming
- hard to control intermediate steps
- feels like working with a "black box"

  </p>
  <p style="text-align:left">

## Effective Hamiltonians
Spin Hamiltonian, Heisenberg, etc... randomly picked

- not consistent (completely different from compound to compound)
- overparameterized

  </p>
  <p style="text-align:left">

## Microscopic theory <!-- .element: class="fragment highlight-red" data-fragment-index="1" -->
Builds energy levels step-by-step from the isolated ion, considering crystal structure and interactions <!-- .element: class="fragment highlight-red" data-fragment-index="1" -->

- considered outdated
- ~~requires a lot of calculations~~
- hard to treat collective excitations

<span style="color:red">Use Computer Algebra!</span> <!-- .element: class="fragment" data-fragment-index="1" -->

  </p>
</Columns>
As you can see, this is again a mixture of HTML/XML and Markdown. Each tag inside <Columns> is treated as a separate argument.
But nothing stops you from using plain text:
.slide

<Columns>

# Title
First column

<Identity>

# Other title
Second one

</Identity>

</Columns>
Identity, dummy, p, or div help WLX differentiate between the first and second arguments. It's similar to how the li tag is used in the ul HTML tag for lists.
You can use the full power of modern CSS to style it however you like.
Symbolic Components
Here we use different approach on constructing components, instead of converting everything to WLXForm strings, keeps its symbolic representation as a tree of expressions.
- XML was designed to carry data - with focus on what data is
- HTML was designed to display data - with focus on how data looks w3school
This allows to declare data expressions such as:
.slide

<Card>
  <CardTitle>Magnon-polaron excitation spectra</CardTitle>
  <CardImage Link={"/attachments/Screenshot 2024-09-14 at 17.33.08-275-b03.png"}/>
  <CardCredits>Song Bao et al. <b>Nature Communications</b> 14 2023</CardCredits>
</Card>
while Card will be responsible for displaying it on a slide.
By the default WLX parser will pass all arguments as strings using WLXForm. We need to disable that first for our property-symbols:
CardTitle   /: ToString[c_CardTitle,   WLXForm] := c
CardCredits /: ToString[c_CardCredits, WLXForm] := c
CardImage   /: ToString[c_CardImage,   WLXForm] := c
Then, let's define a fallback to an empty string if our Card container does not have a valid structure and also make passed arguments orderless:
Card[__] := "";
SetAttributes[Card, Orderless];
Finally we match our tree structure and render it in HTML. This can be done in single WLX cell:
.wlx

Card[CardTitle[Title_], CardCredits[credits__]] := With[{Text = ToStringRiffle[{credits}]},
  <div>
    <h5><Title/></h5>
    <span style="font-size:smaller"><Text/></span>
  </div>
]

Card[CardTitle[Title_], CardCredits[credits__], CardImage[Rule["Link", url_]]] := With[{Text = ToStringRiffle[{credits}]},
  <div>
    <img src="{url}" width="400" style="scale:1.2"/>
    <br/>
    <h5><Title/></h5>
    <span style="font-size:smaller"><Text/></span>
  </div>
]
Here is an example of a slide created using this approach with 4 cards in Row container: